
Do you ever crave a restaurant-quality meal but lack the time or energy for a complex recipe? This simple dish is your answer. You can create an impressive and delicious meal with just a handful of ingredients.
This Garlic Butter Shrimp Skillet recipe is ready in a mere 15 minutes. It is perfect for a hectic weeknight or a special occasion. The method is straightforward, ensuring tender, juicy seafood every time.
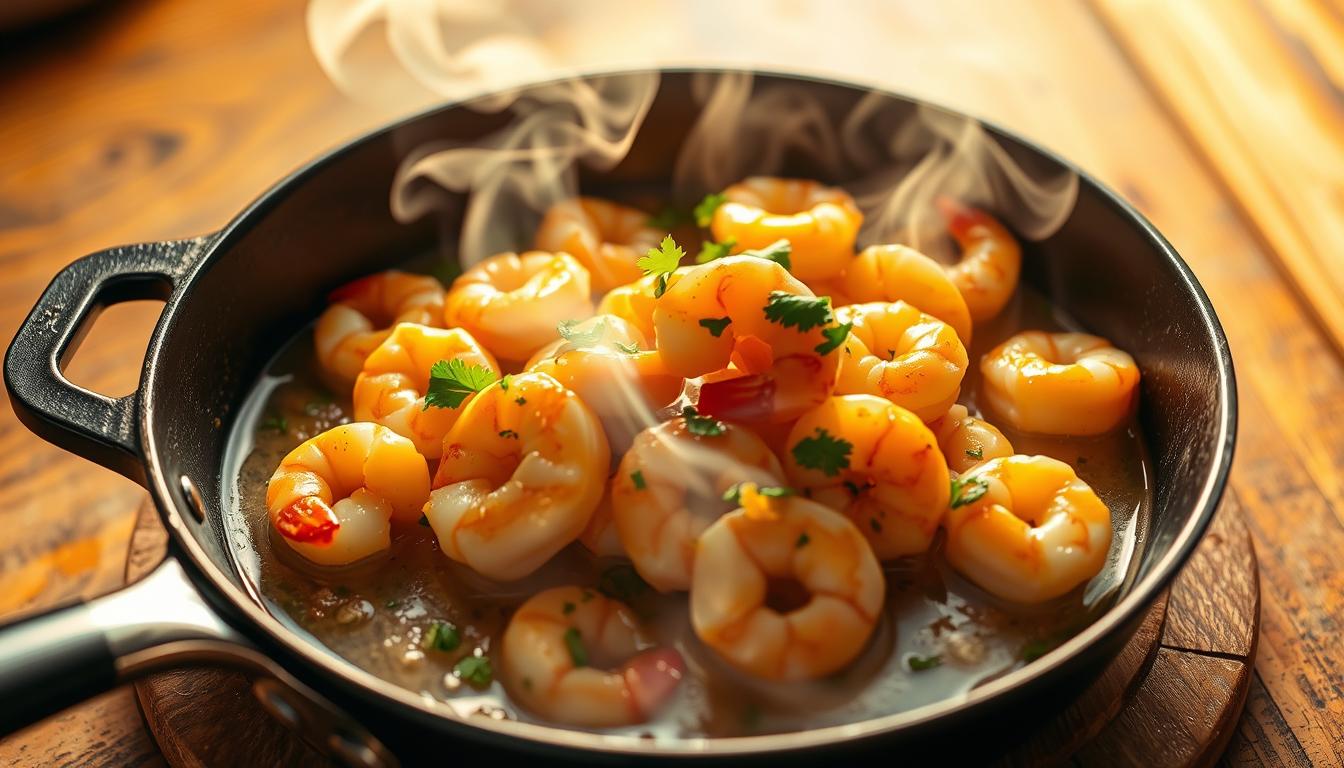
You only need four core components to achieve maximum flavor. The rich, aromatic sauce coats each piece perfectly. It enhances the natural sweetness of the main ingredient.
This versatile creation works as a main course or a fantastic appetizer. Serve it over pasta, rice, or with some crusty bread. It’s a family favorite that delivers incredible results with minimal effort.
Recipe Introduction and Background
The story behind this quick and delicious meal begins with coastal restaurant traditions where simplicity meets extraordinary taste. This approach to cooking focuses on letting quality ingredients shine without complicated techniques.
The Inspiration Behind the Dish
This preparation draws inspiration from Lulu’s Buffet in Myrtle Beach, created by Lucy Buffet. The restaurant’s famous “sloppy shrimp” concept features peel-and-eat seafood swimming in a rich, buttery sauce.
Home cooks have adapted this restaurant favorite for years. It has become a requested special occasion meal in many families. The concept celebrates abundant sauces meant for dipping bread.
What You’ll Experience in Minutes
Within moments of starting, aromatic scents will fill your kitchen. This builds wonderful anticipation for the meal to come. The process demonstrates how few ingredients can create complex taste.
You’ll achieve tender, perfectly cooked results with minimal effort. The luxurious sauce coats each piece beautifully. This dish proves restaurant-quality meals can be simple to prepare.
The entire shrimp recipe comes together in about fifteen minutes. You get impressive flavor without sacrificing valuable time. It’s perfect for busy weeknights or last-minute entertaining.
Key Ingredients for the Garlic Butter Shrimp Skillet
The foundation of this exceptional meal lies in selecting high-quality, simple ingredients that work harmoniously together. Your choice of components directly impacts the final result, transforming basic elements into something extraordinary.
Fresh vs. Frozen Shrimp Considerations
You have flexibility when choosing your main seafood component. Both fresh and frozen options work well for this recipe. The critical factor is proper preparation.
If using frozen varieties, ensure they are completely thawed before cooking. Place them in a sealed bag and submerge in cold water for about 20 minutes. Change the water halfway through for best results.
Always select raw seafood rather than pre-cooked versions. Pre-cooked options become tough when reheated. For convenience, peeled and deveined varieties save preparation time.
The Role of Garlic and Butter in Flavor
Fresh minced garlic provides superior taste compared to jarred alternatives. Its vibrant aroma forms the backbone of your sauce. Use unsalted butter to control seasoning levels precisely.
The combination of butter and olive oil creates an ideal cooking medium. Butter delivers rich flavor while oil prevents burning at higher temperatures. Lemon juice and zest add bright, acidic notes that balance the richness.
Additional seasonings like Italian herbs and red pepper flakes enhance the profile without overwhelming the core flavors. These simple ingredients create complex taste experiences.
Step-by-Step Cooking Process
The magic of this dish unfolds through a simple, timed sequence of steps. Proper preparation ensures each component cooks perfectly. Follow this guide for flawless results every time.
Prepping the Shrimp and Skillet
Begin by thoroughly drying your seafood with paper towels. This crucial step prevents steaming and promotes proper searing. Moisture is the enemy of a good crust.
Heat your large pan over medium-high heat until hot. Add olive oil and wait for it to shimmer. This indicates the ideal temperature for cooking.

Carefully add shrimp to the hot pan. Season immediately with salt and pepper. Allow them to cook undisturbed for about two minutes per side.
Watch for the characteristic C-shape curl and opaque color. Remove them from the heat once cooked through. Set aside while you prepare the sauce.
Creating the Rich Garlic Butter Sauce
Using the same pan, add minced garlic and cook briefly. Stir constantly to release aromatic oils without burning. The fragrance will tell you when it’s ready.
Add butter and Italian seasoning to the pan. Squeeze in fresh lemon juice while swirling the mixture. Some recipes include white wine for extra sauce volume.
Return the cooked seafood to the pan. Toss gently to coat each piece with the delicious sauce. Cook for one final minute to warm through.
Finish with fresh parsley and serve immediately. The entire process moves quickly once you begin cooking. Having ingredients pre-measured is essential for success.
Cooking Your Garlic Butter Shrimp Skillet: Tips & Tricks
The difference between good and great results often comes down to a few key techniques. Proper heat management and timing ensure your seafood turns out perfectly every time. These simple adjustments can transform your cooking experience.
Managing Heat for Perfect Searing
Medium-high heat creates the ideal cooking environment for this dish. It sears quickly without burning delicate ingredients. This temperature gives you that beautiful caramelization.
Watch for visual cues to gauge your heat level properly. The pan should be hot enough that oil shimmers before adding your main ingredient. Proper heat control prevents both undercooking and burning.
When you cook shrimp, the right temperature makes all the difference. It creates that slight crust while keeping the inside tender. This balance is crucial for perfect texture.
Ensuring Shrimp Remains Tender and Juicy
Timing is everything when working with quick-cooking seafood. Overcooking is the most common mistake home cooks make. Properly cooked shrimp should form a loose C-shape.
Remove them from heat as soon as they turn opaque pink. This usually takes just 2-3 minutes per side. The total cooking time should not exceed 5-6 minutes.
Make sure to set cooked shrimp aside while preparing the sauce. This prevents them from becoming rubbery. When you return them to the pan, warm them for only one final minute.
Proper preparation ensures perfect results every time. Pat your seafood dry before cooking to promote searing. Always thaw frozen varieties completely to avoid steaming.
Creative Recipe Variations and Adaptations
The true beauty of this recipe lies in its incredible adaptability to suit various tastes and dietary preferences. You can easily transform the core concept into numerous delicious meals.
Substituting Ingredients for Dietary Needs
This dish is naturally friendly for many eating plans. For a dairy-free version, use ghee or a high-quality vegan butter alternative. These options provide the same rich, silky texture for the sauce.
If you follow a keto or low-carb diet, simple swaps work well. Replace any sweetener with a sugar-free maple syrup or monk fruit alternative. This small change significantly reduces the carbohydrate content.
To make the meal gluten-free, simply verify that all ingredients, like soy sauce, are certified versions. You can also add roasted cherry tomatoes or peppers for extra color and flavor.
Pairing with Pasta, Rice, or Bread
The luxurious sauce is perfect for creating a complete meal. Toss it directly with cooked spaghetti or linguine for a classic pasta dish. The noodles absorb the fantastic flavor beautifully.
For a gluten-free or lighter option, serve it over fluffy jasmine rice or cauliflower rice. The grains soak up the delicious sauce, making every bite satisfying.
Crusty bread is another excellent choice for soaking up every last drop. This versatility makes the recipe a go-to for many different occasions.
Serving Suggestions and Side Dish Ideas
Choosing the right accompaniments completes your dish, turning simple ingredients into a feast. The way you present this meal enhances the overall experience for your guests.

Consider serving this creation in shallow bowls with extra sauce. This allows everyone to enjoy the flavorful liquid fully. The presentation resembles a delicious soup for dipping.
Complementary Crispy Bread and Vegetable Sides
Fresh, crusty bread is essential for soaking up every drop of sauce. Choose a French baguette, artisan Italian loaf, or ciabatta. Lightly toast slices to maintain crispness when dipping.
For vegetable options, consider steamed asparagus or roasted green beans. These provide a fresh contrast to the rich sauce. Roasted cherry tomatoes add sweet acidity that balances the meal perfectly.
Always include lemon wedges for squeezing fresh citrus juice over each portion. Garnish generously with chopped parsley for color and flavor. These simple touches elevate your presentation significantly.
When serving peel-and-eat style, provide plenty of napkins and a bowl for shells. This keeps your dining area tidy and comfortable. The right sides transform your meal into a complete dining experience.
Nutritional Information and Storage Guidelines
Knowing what’s in your food and how to preserve leftovers properly enhances your cooking experience. This information helps you make informed choices about your meals.
Calorie Count and Macros Overview
A single serving of this delicious creation provides balanced nutrition. The exact values depend on your specific preparation method.
| Nutrient | Amount per Serving | Daily Value Impact |
|---|---|---|
| Calories | 234-347 kcal | Moderate |
| Protein | 28-37g | High |
| Carbohydrates | 2-19g | Low |
| Fat | 14-18g | Moderate |
| Saturated Fat | 8g | 35% DV |
This protein-rich option works well for various eating plans. The seafood provides omega-3 fatty acids and antioxidants.
Proper Storage and Reheating Techniques
Store leftovers with sauce in airtight containers. Refrigerate for up to three days to maintain quality.
For longer preservation, freeze for two to three months. Make sure containers seal tightly to prevent odor absorption.
Thaw frozen portions in the refrigerator overnight. Reheat gently in a pan over low heat until just warmed.
Avoid microwave reheating as it creates rubbery texture. The key is warming without recooking your dinner.
Additional Tips for Kitchen Efficiency
Mastering kitchen efficiency transforms quick meals from stressful to seamless. Proper organization before cooking ensures your dinner preparation flows smoothly from start to finish.
Prepping Ingredients Ahead of Time
The secret to making this recipe work perfectly lies in preparation before heating your pan. Professional chefs call this approach “mise en place,” meaning everything in its place.
Measure all dried seasonings into one small bowl near your stove. This saves precious seconds during the fast-paced cooking process. Having ingredients ready means the actual cooking takes just minutes.
Prepare your aromatics and liquids before starting. Mince garlic in advance and measure butter at room temperature. Combine wine and stock in the same measuring cup to minimize cleanup.
Juice and zest your lemon before turning on the heat. Keep these components in separate containers for easy access. This organization transforms what could be stressful into a calm experience.
You can prep ingredients hours or even a day ahead. Refrigerate prepared components until dinner time. With this system, your entire meal comes together in about fifteen minutes.
Conclusion
What makes this preparation truly special is how it elevates everyday components into something extraordinary through careful technique. You achieve restaurant-quality results without professional equipment or extensive training.
The method demonstrates that impressive flavor comes from understanding basic cooking principles. Proper heat management and timing create perfect texture in your main ingredient. Fresh lemon juice and quality olive oil balance the richness beautifully.
This approach to cooking empowers you to create memorable meals on busy schedules. The versatility allows for endless adaptations while maintaining the core appeal. You’ll find yourself returning to this reliable recipe time after time.
Remember those final touches that make all the difference. Fresh parsley and extra lemon wedges add brightness and visual appeal. Serve with your favorite sides to complete the dining experience.